

Shedding Light on the Versatility and Elegance of Light Armed Sconces
Introduction
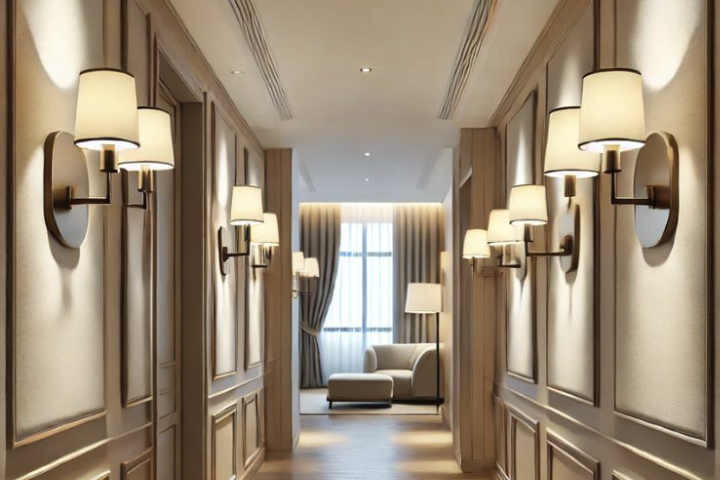
Light is a crucial element that can greatly affect the ambiance and aesthetics of any space. The use of light armed sconces has gained popularity in recent years for their versatility and elegance. These wall-mounted light fixtures offer a wide range of design options and can be used to complement any interior decor style. In this article, we will explore the different aspects of light armed sconces, including their design, functionality, and installation.
The Basics of Light Armed Sconces
As the name implies, light armed sconces are light fixtures with an arm that extends from the wall. This arm can be made of different materials such as metal, wood, or glass. The sconce can have one or more arms, depending on the design. The light source can be a bulb, candle, or LED, depending on the type of sconce.
In terms of design, light armed sconces come in a wide range of styles, from modern to traditional. Some sconces have a simple and straightforward design, while others are more ornate and feature intricate details. The finish of the sconce can also vary, with options such as brushed nickel, brass, or black.
Functionality
One of the main advantages of light armed sconces is their versatility in terms of functionality. They can be used in various ways, such as:
- As task lighting: Sconces can be used to provide focused lighting for specific tasks such as reading or applying makeup.
- As ambient lighting: Sconces can be used to create a warm and cozy ambiance in any room.
- As accent lighting: Sconces can be used to highlight a particular piece of artwork or feature in the room.
Installation
The installation of light armed sconces can vary depending on the type of sconce and the location of the installation. However, in general, the following steps should be followed:
- Choose the right sconce for the space and design.
- Turn off the electricity to the area where the sconce will be installed.
- Locate the stud where the sconce will be mounted.
- Mark the location of the mounting bracket on the wall.
- Drill holes into the wall and install the mounting bracket.
- Attach the sconce to the mounting bracket.
- Connect the wiring according to the manufacturer’s instructions.
- Turn the electricity back on and test the sconce.


Related Posts
Waterproof Bathroom Downlight: Anti Glare Design